Vandaag wil ik met jullie delen hoe ik bloemen inkleur en schaduw crieer..
Ik gebruik hiervoor Spectrum noir potloden(deze zijn op basis van was) maar ,als je een ander soort potloden gebruikt, kun je deze techniek natuurlijk ook gebruiken. Ik ben geen perfecte kleurder maar dit is hoe ik het doe..
Gebruikte matrialen:* Spectrum noir potloden of een ander potlood op wasbasis
* blending solution of geurloze terpentine
*doezelaars
*fijn schuurpapier
* bloemenstempel naar keuze.Ik print mijn digitale of stempel mijn gewone stempels om in te kleuren met potloden op cardstock van Noordesign en stempel met Memento inkt Tuxedo Black
Je gebruikt het schuurpapier om een klein laagje van je doezelaar af te schuren als je van kleur wisselt.
Hello Evryone,
Today I want to share with you how I colour flowers and create shading.
I use Spectrum Noir pencils(these are waxed based) but if you use diffrent pencils you can try this as well
I'm not a perfect colourer but this is how I do it
Used materials: *Spectrum Noir pencils or other waxed based pencils
*Blending solution
*paper stumps
*fine sanding-paper
*flower stamp of choise I print my digis or stamp my stamps for pencils on a cardstock from Noordesign! with Mento inkt Tuxedo Black
You use the sanding paper.to sand of a little of your paper stump when you switch colours
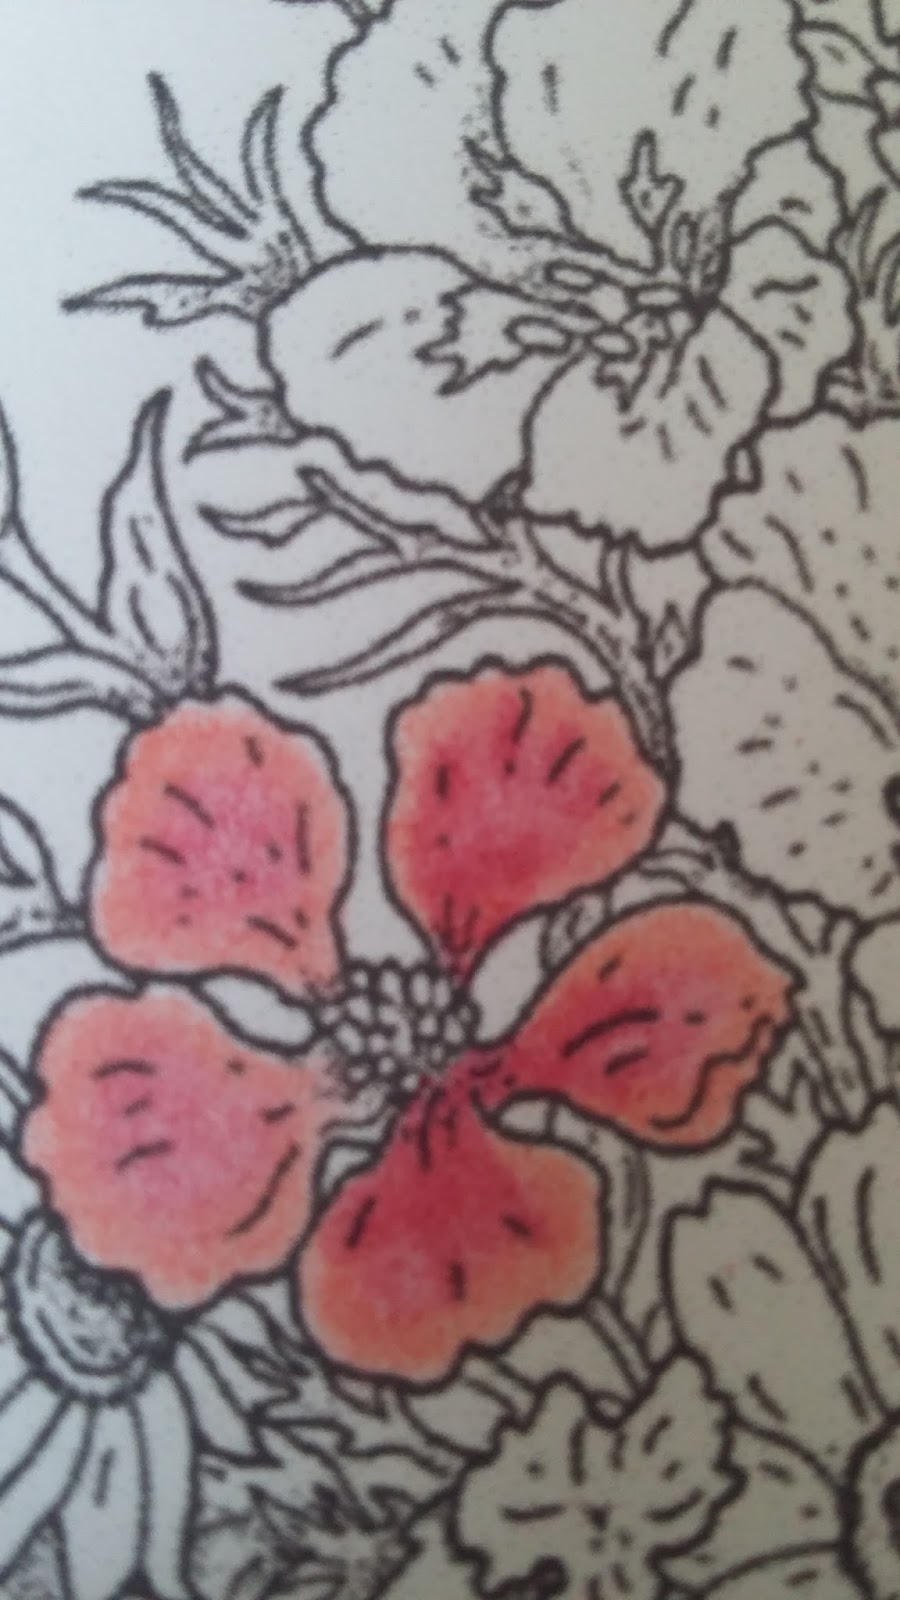
 Ik gebruik meestal 3 vershillende kleurhoogtes in dezelde kleur, ik zeg meestal omdat er ook bloemen zijn met meerdere kleuren hebben. in dit geval in de kleur rood: dus 1 licht rode, 1 medium rood en 1 donkerrood. En ik start in dit geval met de lichtste kleur zoals je kunt zien in de foto.LET OP! Houd je potlood niet te laag vast bij de eerste laag! Je zet hierdoor te veel druk op je potlood zodat je niet meerdere lagen kunt opbrengen. I use 3 pencils in the same colour with diffrent shades most of the time, I say most of the time because you also have flowers with multiple colours. in this case I used red so this meens you need 1 light red, 1 medium red and one dark red. In this case I''ve started with the lightest colour as shown in the picture above. PLEASE NOTICE! Don't hold your pencil to low .. You should hold it in your hand around the middle of the pencil.. Because if you hold it to low, the pressure will be to mutch and you wil colour to dark, so you can't ad any more layers of colour |
 |
| Nu gebruik je de middel rode potlood en vult het blaadje in zoals te zien op de foto. Gebruik hierna je doezelaar en blending solution(dus een beetje blending solution aan je doezelaar ) Vermeng met je doeselaar de lichte en de medium rood..Ga altijd van de lichtste kleur naar de medium kleur enz Now you can use your medium red to fill in the pettal. Use your paper stump and blending solution to blend both colours. always go from light to med etc. |
 |
| Herhaal beide kleuren maar houdt je potloden nu lager vast zodat je meer kleur opbrengt Repeat both colours and hold your pencils a bit lower so you add more colour. |

 |
| Gebruik nu het donker rode potlood om diepte en schaduw aan te brengen. In dit geval heb ik het hart van de bloem donker gemaakt. Gebruik hierna weer je doezelaar en blending solution om de 3 kleuren mooi in elkaar over te laten lopen Now use your dark red pencil to add dept and shading. in this case I added the darkest colour to the hart of the flower..you can also add the dark tone were petals are toutching eatch other. Use your paper stump and blending solution again to blend all 3 colours |
 |
| Kleur dezelfde bloemen allemaal op deze manier Repeat this on all the flowers that are the same |
 |
| dit zijn alle rode bloemen ingekleurd These are all coloured red flowers |
 |
| Doe nu hetzelfde met de andere bloemen met andere kleuren. Dit zijn de 3 kleuren die ik heb gebruikt voor de zonnebloemen. Repeat this with the other flowers using the same technic. These are the 3 colours I've used for the sunflowers |
 |
| Dit is de stempel met alle zonnenbloemen ingekleurd. Het hart van de bloemen is ingekleurd met 2 kleuren bruin. This is the stamp with the finished sunflowers. The cores of the flowers are coloured in with 2 shades of brown |
 |
| Dit is een andere techniek die ik ook wilde laten zien. Ik heb hiervoor een donker oranje potlood gebruikt. Kleur in het hart van de bloem in met oranje, houd je potlood in het midden vast zodat de eerste laag niet te dik is. Gebruik je doezelaar en blending solution en begin nu in het hart van de bloem en verdeel de kleur zo naar de bijna buitenkant van de blaadjes. En herhaal dit bovenste nog 1 keer. Nu heb je een bloem die van binnen naar buiten van oranje naar wit toe loopt. This is a diffrent method that I wanted to show you. I used one pencil, a dark orange one. I started colouring in the hart of the flower. Just a thin layer so hold your pencil in the middle. Use your paper stump and blending solution from the inside of the flower till you get almost to the outside. Repeat this one more time. This time hold your pencil a bit lower. Now you have a flower that's orange in the inside and white on the outside |

 |
| Kies 3 verschillende tinten groene potloden, weer 1 lichte, 1 medium en 1 donker groene Ik heb met de donkerste tint de takjes ingekleurd Choose 3 pencils in 3 diffrent shades of green so 1 light, 1 medium and 1 dark green. I coloured the branches with the darkest green |
 |
| Begin bij de blaadjes weer met de lichtste kleur en gebruik dezelfde techniek als bij de bloemen Start with the leaves with the lightest colour and use the same method as on the flowers |


 |
| Nog 1 keer de techniek met 1 potlood. One more time the one pencil method |


 |
| Gebruik voor de vaas 3 verschillende tinten blauw, begin in dit geval met de donkerste kleur aan de buitenkant van de vaas.Gebruik dan het medium blauwe potlood en dan het licht blauwe potlood. Gebruik in het midden van de vaas geen kleur. Gebruik weer je doezelaar en blending solution om de kleuren mooi te laten overlopen. Herhaal dit nog 1 keer en houdt nu je potlood lager vast. Als je dit hebt gedaan ga je met je doezelaar van het lichte blauwe vak naar het midden van de vaas zodat hier heel licht blauw in wordt vermengd. Use for the vase 3 shades of blue pencils and start with the darkest colour then the medium blue and then the light blue..Leave the middle of the vase white. Use a paper stump and blending solution to blend the 3 shades together from light to dark. Repeat this one more time. And when your finished use your stump to blend the light blue and white |


 |
| Gebruik 3 tinten grijs om de witte gedeeltes shaduw te geven en gebruik dezelfde techniek als bij het blauw. Use 3 shades of grey to give the white parts of the vase some shading and use the same method as with the blue |
 |
| Ik heb met een medium en donker grijze kleur nog schaduw aangebracht om de bloemen en vaas en hiermee ook shaduw gekrieerd op de tafel( medium grijs en licht bruin. Gebruik hiervoor ook weer je doezelaar en je blending solution om het mooi over te laten lopen. I used a medium and dark grey pencil to add shading arround the vase and flowers and on the table(medium grey and a light brown)Use your paper stump and blending solution to blend the white with the grey shading |
 |
| En dit is het kaartje dat ik met deze ingekleurde stempel heb gemaakt. This is the card I made with the finished stamp. Creatieve groetjes, Veer Happy Crafting! Veronique |
thank you for sharing
BeantwoordenVerwijderenYou're welcome! Xx
VerwijderenVery nicely done...a super tutorial!
BeantwoordenVerwijderenThank you very mutch! I have to Thank you..because of your encouragments to have a go at tutorials.xx
Verwijderenwow super mooie uitleg en super mooi gekleurd :)
BeantwoordenVerwijderengroetjes ine
Dank je wel Ine voor je lieve compliment!
Verwijderen