Volgers

woensdag 9 december 2015

Nieuwe challenge bij Crafting for all seasons Challenge 116 Anything but a card.

Hallo allemaal,
Vandaag start er weer een nieuwe challenge bij Crafting for all seasons. Challenge 116 Anything but a card.
Deze pillowbox heb ik gemaakt voor deze challenge.

Hello Evryone,
There's a new challenge starting at Crafting for all seasons. Challenge 116 Anything but a card.
This is the project I made for this challenge. A christmas pillowbox.


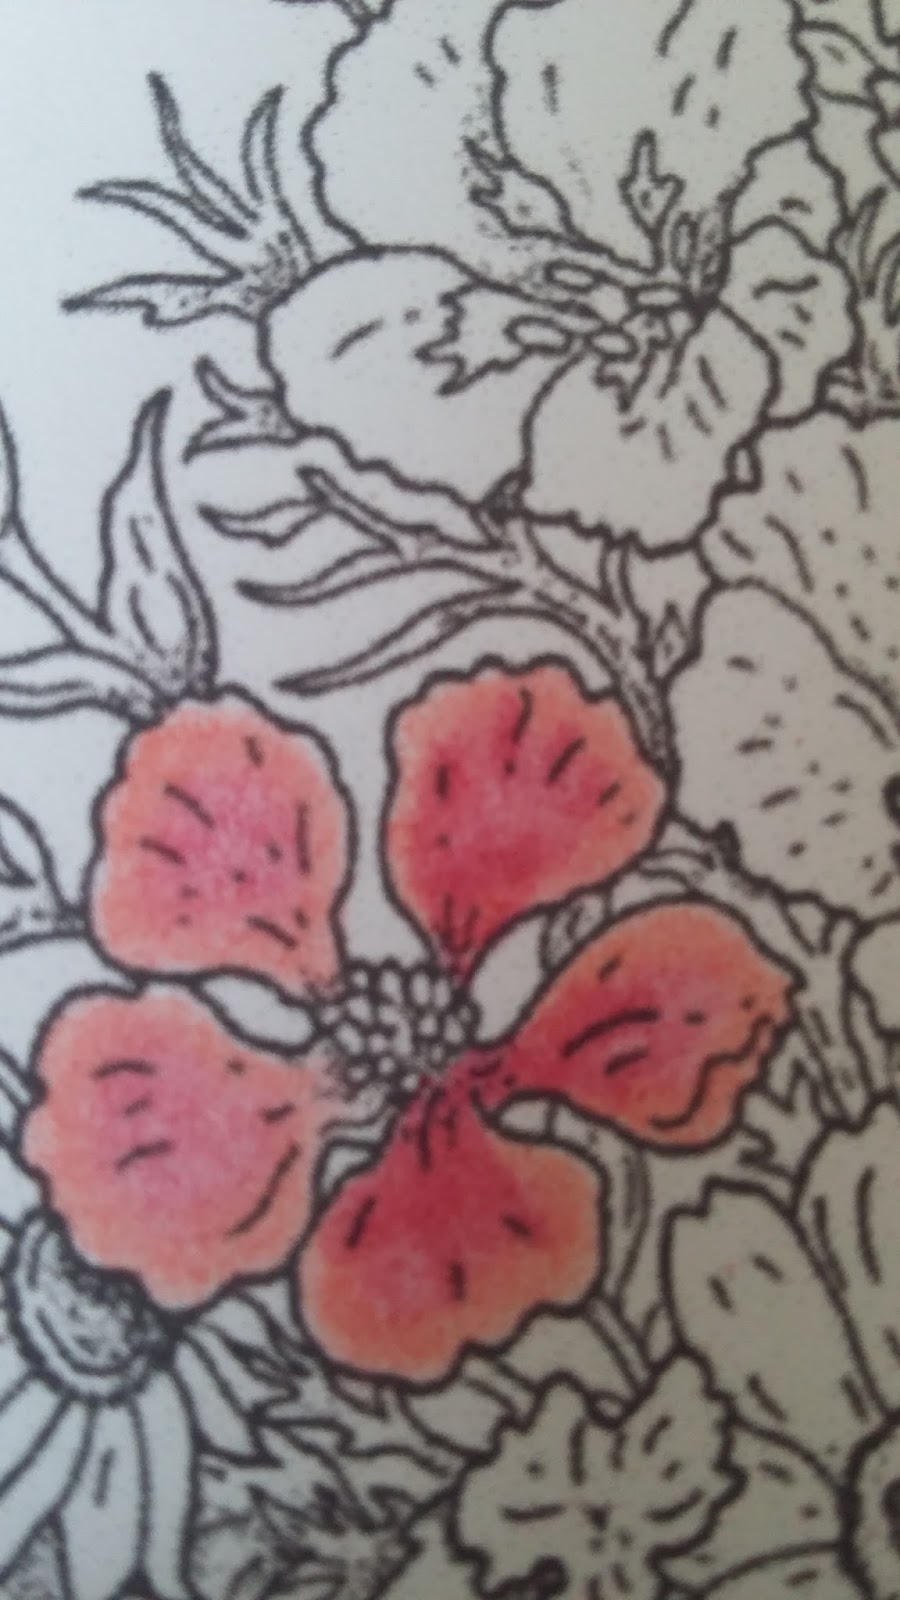
Voor deze pillowbox heb ik dit prachtige plaatje Christmas holly sprite gebruikt van Aurora Wings.
Ze is ingekleurd met Polychromos en Derwent coloursoft potloden.De pillowbox is gemaakt met een shape art stencil van Dutchdoobadoo. De achtergrond heb ik gemaakt met een embossingfolder die snow christals heet . Daarna is de achtergrond beinkt met een dewdrop briliance inkt red/gold.De bloemetjes zijn van Marianne design. En de tekststempel is van Noordesign. De takjes heb ik geponst met een Martha Stuart pons die branch heet.

For this pillowbox I used this wonderfull image that's called Christmas Holly Sprite by Aurora Wings.
She''s coloured with Polychromos and Derwent coloursoft pencils.The pillowbox is made with a shape art stencil from Dutch Doobadoo. The background is made with a embossingfolder that''s called Ice christals. I used a dewdrop Briliance ink red/gold on it. The flowers are from Marianne design.The semntiment stamp is from Noor Design. The branches are punched with a Martha Steward punch. That's called branch. I added some rhinestones and some Wink of Stella clear on the image.

A big thank you for one of our sponsors this challenge:
Aurora Wings

Ik hoop dat ik jullie heb geinspireerd om mee te doen aan onze challenge. Er zijn o.a stempels te winnen van onze sponsors.
Of kom eens een kijkje nemen : Crafting for all seasons
Creatieve groetjes,
Veer

I hope that I've inspired you to join our challenge. There are wonderfull digis to win!
Or just come over and take a look..Crafting for all seasons
Happy Crafting!
Veronique


dinsdag 1 december 2015

Nieuwe challenge bij Creative ladybirds Creations #Challenge 10

Hallo allemaal,

Het is weer de 1ste van de maand. Dat betekent dat er een nieuwe challenge start bij                         Creative ladybird Creations: #Challenge 10 . Zoals altijd Anything goes. Dit is het DT kaartje dat ik heb gemaakt voor deze challenge.

Hello Evryone,

It's the 1st of the month again. There is a new challenge starting today over at Creative Ladybird Creations:
#10 As always Anything goes. This is the DT card I made for this challenge.


Voor dit kaartje heb ik  het grappige plaatje Make it snappy reindeer trio  van Bugaboo  stamps gebruikt
Het plaatje is ingekleurd met Faber Castell Polychromos potloden. De achtergrond heb ik gemaakt met 1 van de nieuwe songtekst stempels van Marianne Design. Deze is gestempeld met Versamarc en bewerkt met WOW embossing poeder pearl white. Daarna ingekleurd met Distress inkt Mowed lawn. De achtergrond en de sterren zijn bewerkt met een witte en gouden gelpen. Verder heb ik glossy accents van Ranger gebruikt op de oogjes,lampjes ,sterren en banner.

For this card I used this funny image that's called :Make it snappy reindeer trio from Bugaboo stamps
I coloured the image with Faber Castell polychromos pencils.The background is made with one of the new christmas songs stamps from Marianne Design. I stamped it with Versamarc ink and used WOW pearl heat embossing powder on it. Then coloured it with Distress ink Mowed lawn. The snow and stars on the image are made with a white and golden gelpen. I used glossy accents from Ranger on the eyes, lights stars and banner

A big thank you to Bugaboo this months sponsor !
Ik hoop dat ik jullie heb geinspireerd om ook eens mee te doen aan onze challenge. Je kunt natuurlijk ook gewoon een kijkje komen nemen..Creative ladybirds creations
  
Creatieve groetjes,
Veer

I hope that I've inspired you to join in our challenge. You could also just take a look. Creative Ladybirds Creations

Happy Crafting!
Veronique

I would like to join the folowing challenges:


woensdag 25 november 2015

BRRRR it's cold outside

Hallo allemaaal,
Vandaag start er een nieuwe challenge bij Crafting for all seasons Challenge 115 Brrr it's cold outside.
Dit is het DT kaartje dat ik heb gemaakt voor deze challenge.

Hello Evryone,
There's a new challenge starting today at Crafting for all seasons. Challenge 115 Brrrr..It's cold outside.
This is the DT card I made for this challenge
Ik heb voor dit kaartje gebruik gemaakt van de shape art stencil Snowglobe van Dutch Doobadoo.
Het prachtige plaatje is van That Craft Place en heet Snowy Boots. Ze is ingekleurd met Derwent coloursoft en Marco Raffine potloden. De stempels in de snowglobe zijn van Studio light. De ijskristal stans is van Noordesign en de teksstempel is van Penny Black
I used the Dutch Doobadoo shape art stencil  snowglobe for this card. This beautifull image is called Snowy Boots. She''s coloured with Derwent Coloursoft and Marco Raffine pencils. The stamps inside are from Studiolight. The icecristal is from Noordesign. The sentimant is from Penny Black.


A big thanks to our sponsor That Craft place!

Ik hoop dat ik jullie heb geinspireerd om mee te doen aan onze challenge.

Creatieve groetjes,
Veer
I hope that I've inspired you to join in our challenge

Happy Crafting!
Veronique

vrijdag 20 november 2015

Niewe challenge bij Crafting with Friends challenge 11

Hallo allemaal,
Vandaag start een nieuwe challenge bij Crafting with friends challenge 11
Dit is het DT kaartje dat ik heb gemaakt voor deze challenge.

Hello Evryone,
There's a new challenge starting over at the Crafting with Friends challengeblog Challenge 11.
This is the DT card I made for the challenge.


Ik heb dit leuke Monster gebruikt op mijn kaart en hij is ingekleurd met Marco Raffine potloden.
Het patroon van de kaart is van de blog van Noordesign. De tekst heb ik zelf gemaakt met losse letterstempels.
De mal onder het monster is gestanst in parlemoer papier en is van Marianne design.
De oogjes van het monster heb ik aangezet met glossy Accents van Ranger.

I used this cute Monster on my card en he is coloured with Marco Raffine pencils.
I found this cute card shape at the Noordesign blog. The sentiment is made with letter stamps and stamped with Archival Jet black ink. The diecut under the monster is a dies from Mariannne design. I made it from some pearly white paper. I used some Glossy Accents from Ranger on the eyes.

Onze sponsor van deze maand is Creepie Cute Stamps
Hartelijk bedankt!
This month's sponsor is Creepie Cute Stamps
Thank you for sponsoring this month's challenge!


Ik hoop dat ik jullie heb geinspireerd om mee te doen met onze challenge bij Crafting with Friends

Creatieve groetjes,
Veer

I hope that I've inspired you to join us at Crafting with Friends

Happy Crafting!
Veronique

I want to enter in the following challenges:
 world wide open designteam challenge challenge #5

woensdag 11 november 2015

Crafting for all seasons challenge 114 theme embossing

Hallo allemaal,
Vandaag start er een nieuwe challenge op het Crafting for all seasons challenge blog.
Challenge 114 thema embossing.
Dit is het DT kaartje dat ik heb gemaakt voor deze challenge.

Hello evryone,
There is a new challenge starting over at the Crafting for all seasons challenge blog.
Challenge 114 theme embossing.
This is the DT card I made for this challenge.


Deze prachtige afbeeldng heet Genie en ze is ingekleurd met Derwent coloursoft en Marco Raffine potloden.
De achtergrond is DCP papier en ingekleurd met panpastel turqouise en violet , daarna heb ik het papier gefixeerd en geembossed met een embossing folder van Creative Expressions die feathers heet.
Met een Memento Dewdrops Briliance violet inkt heb ik de veren nog even geaccentueerd.
De achtergrond is gemat op een vierkant stuk linnen violet van 12,5 bij 12,5 cm. De rand is bewerkt met een pearlmaker pen. Deze zijn daarna op een standaard 13,5 bij 13,5 cm vierkante lila kaart geplakt.
De ogen zijn aaangezet met Glossy Accents van Ranger en k heb nog wat plaksteentjes torgrvorgd in de hoeken van de kaart.

This beautiful image is called Genie and she is coloured with Dewent coloursoft and Marco Raffine pencils.
The background is made from DCP paper and coloured with 2 colours Panpaste Violet and Turqouise.
I embossed the paper with an embossing folder from Creative expressions that's called Feathers. I added some detail on the feathers with a Memento dew drop briliance violet. I put the background on a purple piece of paper (12,5 X 12,5cm) I used a pearlmaker pen on the edges between the 2 pieces of paper.I glued it on a  lilac card (13,5 X 13,5 cm)
I added some Glossy Accents from Ranger to the eyes . and added some Rhinestones in the corners of the card.

Onze sponsor van deze maand is Scrapper's Delights
This months sponsor is Scrapper's Delights

Ik hoop dat ik jullie heb geinspireerd om mee te doen met de challenge bij Crafting for all seasons
Je kunt natuurlijk ook gezellig een kijkje komen nemen.

I hope that I've inspired you to join  the challenge at Crafting for all seasons
Or just come over and take a look.

Creatieve groetjes,
Veer

Happy Crafting!
Veronique


woensdag 4 november 2015

Snowflake princess for DT call Crafts and me

Hello Evryone,

Today I want to share this card with you that I made for the DT call for Crafts and me.
I made this snowflake card with this wonderfull image..
The image is coloured with Derwent coloursoft and Marco Raffine pencils.
The snowflake is a shape art stencil from Dutchdoobadoo. I used white pearl and turqouise linnen paper for the snowflake. And stamped the smallest snowflake with versamarc ink en heat-embossed the tiny snowflakes with really fine embossingpowder. I inked the edges of the white parts with Distress ink Dusty concord. And the turqouise part with dew drop silver.

I added lots of glitter on the dress and crown
and added some rhinestones.

A little close-up 
Products used: * Dutchdoobadoo shape art stencil snowflake
                       *pearl-white and turqouise paper
                       * stamp by Crafts and me
                       *Derwent and Marco Raffine pencils
                       *Distress ink Dusty concord
                       *pearl drop briliance silver ink
                       *Versamarc ink
                       *Fine heat-embossing powder silver
                       *pearl glitter and some transparent glue
                       *rhinestones

I want to thank Crafts and me for the chance to apply for the DT.

If you want to apply for the DT go to: Crafts and me

Happy Crafting!
Veronique


zondag 1 november 2015

Creative ladybirds Creations Challenge 9

Halla allemaal,
Vandaag start er een nieuwe challenge bij Creative ladybirds Creations. challenge 9 Anything goes.
Dit is het DT kaartje dat ik heb gemaakt voor deze challenge.

Hello evryone,
There is a new challenge starting today over at Creative ladybirds creations. Challenge 9 Anything goes.
This is the DT card I made using winter love note fairy from Lacy Sunshine
De winter Love note fairy is ingekleurd met Marco Raffine potloden.
The wwinter Love note fairy is coloured with Marco Raffine pencils.


De achtergrond is gemaakt met een tekststempel van Penny Black en pearl embossing poeder,
Darna heb ik de achtergrond ingekleurd met Gelatos en perfect pearl voor het sterretjes effect.
De rechthoekige mal is van Marianne Design en de ijskristallen zijn van Noordesign!
Ik heb verder veel glitters gebruikt op de jurk en vleugels, helaas zie je dit niet zo goed op de foto's

the backround is made with a sentiment stamp from Penny Black and Pearl embossing powder.
After I made the sentiment I coloured the background with Gelatos and added some Perfect pearl for the stars. The big diecut is from Marianne Design and the snow christals are from Noordesign!.
I added lots and lots of glitter on the dress and wings, It's a shame you can't see it very well in the pictures.

A little close u-up
Thank you so mutch Lacy Sunshine for sponsoring this month!

lacy sunshine

Ik hoop dat ik jullie heb geinspireerd om ook eens een kijkje te komen nemen of om gezellig mee te doen met de challenge
Druk op de link aan de rechterkant van de pagina.
http://creativeladybirdscreations.blogspot.nl/

I hope that I've inspired you to come and take a look or ro join our challenge
Creative ladybird Creations

Creatieve groetjes,
Veer

Happy Crafting!
Veronique


I would like to enter the following challenges:
World wide open design team challenge 5
Once upon a dream fairy tale challenge

woensdag 28 oktober 2015

Crafting for all seasons Challenge 113

Hallo Allemaal,

Vandaag start een nieuwe Challenge op het Crafting for all Seasons Challenge blog. Challenge 113
Dit is het DT kaartje dat ik heb gemaakt voor deze Challenge Dit is een digi van All dresses up stempels en heet Party Frock.

Hello Evrybody,
There's a new challenge starting over at the Crafting for all seasons Challenge blog. Challenge 113.
This is the DT card I made for this challenge. This is a digi from all Dressed up stamps and it's called Party Frock
Ik heb deze dame ingekleurd met Marco Raffine en derwent coloursoft potloden.
Ik heb glitter accenten aangebracht op de jurk.
De vorm van de kaart heb ik gemaakt met een shape art mal van Dutchdoobadoo.
De swirl is van Noordesign!

I coloured this little lady with Marco Raffine and Derwent Coloursoft pencils.
I added lots of glitter to the dress. I used a Dutchdoobadoo shape art stencil for the shape of the card. De swirl is a dies from Noordesign!
I added some pearls to her hair with a pearlmakerpen.

De sponsor van deze maand
https://www.etsy.com/uk/shop/alldressedupstamps?ref=shopsection_shophome_left

This months sponsor
https://www.etsy.com/uk/shop/alldressedupstamps?ref=shopsection_shophome_left

Ik hoop dat jullie gezellig meedoen met onze nieuwe challenge:
http://craftingforallseasons.blogspot.nl/2015/10/challenge-113.html

Creatieve groetjes,
Veer

I hope you will join in at our challenge 
http://craftingforallseasons.blogspot.nl/2015/10/challenge-113.html


Happy Crafting!
Veronique

dinsdag 27 oktober 2015

Birthday card for a special friend..

Hallo allemaal,
Vandaag wil ik een heel speciaal kaartje met jullie delen dat ik heb gemaakt voor een hele speciale vriendin.
Ondanks dat ze aan de andere kant van de wereld woont (Florida USA) en wij elkaar nog nooit hebben ontmoet. Is zij een echte vriendin.

Hello evryone,

Today I want to share a very special card with you that I have made for a very special friend.
Even though she lives on the other side of the world(Florida USA) And we never met . She is a really great friend.


The image is from Mari digis and I coloured her with Marco Raffine Pencils.
The sentiment is stamped with Archival tuxedo black ink and it's from Noordesign.
The background stamp with the roses  iss from viva decor.
The heart is a dies from Noordesign.

I added lots of glitter on the dress(It's ashame you can't see it very good in the pictures.
I added some rhinestones and some pearls in her hair with a pearlmaker pen

A close up of this great image..


I'm going to enter this card in these challenges:
Mari digig challenge #8
Simply papercraft challenge 16
Crafting from the heart challenge 83

I hope that I''ve inspired you
Happy Crafting!
Veronique

vrijdag 23 oktober 2015

Crafting with friends challenge 9

Hallo allemaal,
Vandaag start een nieuwe challenge op het Crafting with friends challenge blog. Challenge 9
Anything goes! Dit is het DT kaartje dat ik heb gemaakt voor deze challenge

Hello Evryone,
There is a new challenge starting at the Crafting with friends challenge blog. Challenge 8 Anything goes!
This is the DT card I made for this Challenge
Deze digi heet Please drink Responsibly. en is van www.stitchybear.com/shop
Ze is ingekleurd met Marco Raffine potloden, verder heb ik gebruik gemaakt van een pearlmaker pen, en glossy accents van Ranger op de bril,glazen,schoenen en lippen.

This Digi is called  Drink Responsible and is from Stitchbear.com. She's coloured with Marco Raffine pencils. I used a pearlmaker pen and glossy accents from Ranger on the glasses, shoes and lips


De sponsor van deze maand
http://stitchybearstamps.com/shop/

This months sponsor
http://stitchybearstamps.com/shop/

Wil je meedoen aan deze challenge of gewoon een kijkje  nemen?
Klik op de banner aan de rechterkant van de pagina of klik op onderstaande link
http://crafting-with-friends.blogspot.nl/2015/10/challenge-9.html


Would you like to join in this challenge or just take a look?
Click on the banner on the right side of this page or go to:

http://crafting-with-friends.blogspot.nl/2015/10/challenge-9.html

Ik hoop dat ik jullie weer heb geinspireerd.
Creatieve groetjes,
Veer

I hope that I've inspired you
Happy Crafting!
Veronique


Quick reminder. Please link up properly When you enter the challenge. 
Please link up to the specific challenge not to the blog.
http://crafting-with-friends.blogspot.nl/2015/10/challenge-9.html


woensdag 14 oktober 2015

Crafting for all seasons Challenge 112

Hallo allemaal,
Vandaag mag ik jullie vertellen dat ik een DT lid ben bij Crafting for all Seasons Challenge Blog!
Dit is een challenge blog met elke 2 weken een nieuwe challenge op woensdag.
Dit is mijn eerste DT werk voor deze blog.

Hello Evrybody,
Today I can tell you that I'm a new DT meber at Crafting for all Seasons Challenge Blog.
This is a challenge blog with evry 2 weeks a new challenge on a Wednesday.
This is my first DT work for this blog.
Het thema van deze Challenge is tasjes en doosjes. Ik heb met de Dutchdoobadoo shape art mal handbag een klein tasje gemaakt in zwart linnen papier. De achtergrond is gemaakt met Faber Castell Gelatos (donkerblauw en donkergroen) Daarna bestempeld met een silioutte stempel van Sheena Davis met Archival inkt Jet Black. De tekst heb ik er met letterstempels gestempeld  met zwarte inkt en toen bewerkt met glow in the dark embossingpoeder.Dus als het donker is geven de letters licht.... De stempel heet Bianca 108 en is van Oddball stamps de sponsor van deze Challenge en is ingekleurd met Marco Raffine potloden.

The theme of this challenge is bags and boxes. I made a little treat bag using the Dutchdoobadoo shape art stencil handbag. The background is made using Faber Castell Gelatos(dark green and dark blue)I stamped the flower border with a Silouette stamp from Sheena Davis with Archival Jet Black ink. De letters are stamped with Archival as well. After stamping them I used Glow in the dark embossing powder on the letters. So they will light up in the dark... The image is called Bianca 108 and is from Oddball stamps. the sponsor of this Challenge en I coloured her with Marco Raffine pencils.


https://www.etsy.com/uk/shop/OddballArtCo

Willen jullie meedoen aan deze challenge, of gewoon een kijkje nemen. klik dan op de banner aan de rechterkant van de pagina. Of ga naar :
http://craftingforallseasons.blogspot.nl/

Would you like to join us in the challenge or just take a look?
You can click on the banner on the right side of my page. Or go to:
http://craftingforallseasons.blogspot.nl/

Ik hoop dat ik jullie allemaal heb geinspireerd.
Creatieve groetjes,
Veer

I hope that I've inspired you.
Happy Crafting!!
Veronique

donderdag 1 oktober 2015

Nieuwe challenge 8 bij Creative ladybird Creations

Sweet chai Fairy


Hallo allemaal.

Het is weer de eerste van de maand. Dat betekent dat er een nieuwe challenge start bij Creative ladybird creations. Challenge 8.
Dit is het DT kaartje dat ik voor deze challenge heb gemaakt met de prachtige afbeelding Sweet Sai Fairy

Hello evryone,
It''s the first of the month. That meens a new challenge at Creative ladybirds Creations.
This is the DT card I made using the wonderfull image that's called Seet Sai Fairy

Het plaatje is ingekleurd met Derwent Couloursoft potloden .

The image is coloured with Derwent Coulorsoft Pencils.

https://www.etsy.com/uk/shop/OddballArtCo

De sponsor van deze maand is Oddball
This month's sponsor is Oddbal


Ik hoop dat ik jullie heb geinspireerd om mee te doen aan de challenge.
http://creativeladybirdscreations.blogspot.nl/

Creatieve groetjes,

I hope that I've inspired you to join us at
http://creativeladybirdscreations.blogspot.nl/

Happy Crafting!
Veronique


woensdag 30 september 2015

Kleine tutorial hoe kleur ik haar/ Small tutorial how do I colour hair


Hallo Allemaal,

Vandaag wil ik in een korte tutorial uitleggen hoe ik haren inkleur met potloden.
Ik gebruik hiervoor Derwent coloursoft potloden, maar je kunt hier natuurlijk ook andere potloden op was basis voor nemen zoals Spectrum noir of Faber Castell Polychromos.

Hello evryone,

Today I want to share a little tutorial I made how I colour hair with pencils.
I used Derwent coloursoft pencils but, you can use diffrent pencils on a wax base like Spectrum noir or Faber Castell Polychromos.

Gebruikte matrialen: *3 kleuren potloden 1 lichte, 1 middel en 1 donkere potlood in de kleur die je je haren                                       wilt maken.
                               *1 doezelaar
                               *reukloze terpetine of blending solution
Used materials:        * 3 shades of pencils 1 light, 1 medium and 1 dark in the colour that you want to do                                            your hair
                               * 1 paper stump
                               * Gamesol or blending solution

Ik kleur altijd eerst de huid in, zo krijg je al een beter beeld wat voor een kleur haar dat je zou willen maken.
I always colour the skin first, you can get a better idea what colour you would like to make the hair.

Kleur haren altijd 1 streng tegelijk zo krijg je beter overzicht. Ik begin altijd met de lichtste kleur, op deze plek geef je de licht inval weer.
Colour hair one strand at a time, it will give you a better overvieuw. I always start with the lightest colour. This is the spot where the light touches the hair

Gebruik dan de medium kleur en ga een heel klein beetje over de lichtste kleur heen.
Then use the medium colour and just touch the lightest colour a little bit.

Als laatste gebruik je de donkerste kleur en ook bij deze ga je over het randje van de middelste kleur.
Last but not least.. Use the darkest colour to complete your strand of hair. and touch the medium just a little bit.

Gebruik je doezelaar en blending solution om de 3 tinten mooi in elkaar over te laten lopen.
Use your paper stump and blending solution to make nice smooth transfers between the colours.

Start hierna weer met de lichtste kleur en maak kleine streken met je potlood in het lichtste gedeelte van de streng haar , ga hierbij ook een beetje over de middelste kleur heen. Houd je potlood laag vast zodat je wat meer druk op het potlood zet.
Start again with the lightest colour and make small flicks with your pencil in the lightest area of your hair -strand.Make sure you do a little flicking over the medium coulour in your strand. Hold your pencil low, so you add some more pressure to your pencil

Herhaal dit met je medium kleur potlood en zorg dat je hierbij zowel je lichtste als je donkerste kleur een beetje raakt.
Repeat this proces with the medium colour pencil, make sure you toch the lightest and the darkest area of your strand.

Herhaal dit kleine streken zetten ook met je donkerste potlood.
Repeat this proces with the darkest pencil.

Begin met de volgende haarstreng en herhaal dit proces todat je alle haren hebt ingekleurd. Probeer steeds 1 streng tegelijk te doen ,zo houdt je overzicht.
Start with the the next strand of hair. repeat the proces till you've coloured all the hair.Try to do 1 strand at a time so you keep a good  overview of what you are doing.


Some more pictures of the colouring proces

Nog wat meer foto's van het inkleuren.

Zo ziet het plaatje eruit als het hele haar is ingekleurd
This is a picture when the hair is coloured .

Het geheel ingekleurde plaatje
The completly coloured image.

Ik hoop dat ik jullie allemaal heb kunnen inspireren.
Creatieve groetjes,
Veronique

I hope that I've inspired you.
Happy Crafting!
Veronique

vrijdag 25 september 2015

Nieuwe challenge 7 bij Crafting with friends challenge blog

Hallo allemaal.

Ik mag jullie vandaag met trots vertellen .Dat ik vanaf nu een nieuw Designteam-lid ben bij Crafting with Friends.Vandaag start bij hun een nieuwe challenge 7
Dit is het eerste DT kaartje dat ik met jullie wil delen.Ik heb gebruik gemaakt van de stempel Bee Hummingbird. Deze stempel is van Sprinkle and sparkle:

Hello evryone,
I'm proud to say. That I am a new DT member at Crafting with Friends
Today there will start a new challenge 7
This is the first DT card that I made using Bee Hummingbird by Spinkle and Sparkle
Deze stempel is ingekleurd met Polychromos potloden.
Het gedeelte waar de kolibrie en de bloem opzitten zijn gemaakt van Micca, zodat het lijkt of de kolibrie vliegt.

I coloured the stamp with Polychromos pencils. The part of the card were the hummingbird and flower are on is made out of Micca . So it looks like the hummingbird is flying in mid -air.


http://sparklensprinkle.com/

Onze sponsor voor deze maand
our sponsor for this month


Ik hoop dat ik jullie allemaal heb geinspireerd om mee te doen aan onze nieuwe challenge
Klik op de link rechtsboven om naar de challenge blog te gaan.

Creatieve groetjes,
Veer

I hope that I've inspired you to join us at our new challenge.
Happy Crafting,
Veronique


donderdag 10 september 2015

10e van de maand New releases bij Cute as a Button

Hallo Allemaal,

Het is weer de 10 van de maand! Dat betekent new releases bij Cute as a Button.
Dit is het DT kaartje dat ik heb gemaakt met 1 van de New releases. Dit prachtige plaatje heet Date Night
en is te vinden in de webshop. Je vind de link naar de webshop aan de rechterkant van de pagina.

Hello Evryone,
It's the 10th of the month! New releases at Cute as a button.
This is the DT card i made with one of the New Releases. This beautiful image is called Date Night .
You can fiend her in the webshop. Ther's a link on the right side of the page.


Het plaatje is ingekleurd met spectrum noir markers

I coloured the image with Spectrum noir markers

Een close-up

Ik hoop dat ik jullie allemaal heb geinspireerd.
Creatieve groetjes,
Veer

I hope that I've inspired you
Happy Crafting!
Veronique

zondag 6 september 2015

Tutorial: hoe kleur ik bloemen in met potloden en maak ik schaduw/ Tutorial: How do I colour flowers and create shading with pencils

Hallo Allemaal,
Vandaag wil ik met jullie delen hoe ik bloemen inkleur en schaduw crieer..
Ik gebruik hiervoor Spectrum noir potloden(deze zijn op basis van was) maar ,als je een ander soort potloden gebruikt, kun je deze techniek natuurlijk ook gebruiken. Ik ben geen perfecte kleurder maar dit is hoe ik het doe..
Gebruikte matrialen:* Spectrum noir potloden of een ander potlood op wasbasis
                              * blending solution of geurloze terpentine
                              *doezelaars
                              *fijn schuurpapier
                              * bloemenstempel naar keuze.Ik print mijn digitale of stempel mijn gewone stempels om                                    in te kleuren met potloden op cardstock van Noordesign en stempel met Memento                                        inkt Tuxedo Black
Je gebruikt het schuurpapier om een klein laagje van je doezelaar af te schuren als je van kleur wisselt.
                           

Hello Evryone,
Today I want to share with you how I colour flowers and create shading.
I use Spectrum Noir pencils(these are waxed based) but if you use diffrent pencils you can try this as well
I'm not a perfect colourer but this is how I do it
Used materials: *Spectrum Noir pencils or other waxed based pencils
                        *Blending solution 
                        *paper stumps
                        *fine sanding-paper
                        *flower stamp of choise I print my digis or stamp my stamps for pencils on a cardstock from                           Noordesign! with Mento inkt Tuxedo Black
You use the sanding paper.to sand of a little of your paper stump when you switch colours


Ik gebruik meestal 3 vershillende kleurhoogtes  in dezelde kleur, ik zeg meestal omdat er ook bloemen zijn met meerdere kleuren hebben. in dit geval in de kleur rood: dus 1 licht rode, 1 medium rood en 1 donkerrood. En ik start in dit geval met de lichtste kleur zoals je kunt zien in de foto.LET OP! Houd je potlood niet te laag vast bij de eerste laag! Je zet hierdoor te veel druk op je potlood zodat je niet meerdere lagen kunt opbrengen.

I use  3 pencils in the same colour with diffrent shades most of the time, I say most of the time because you also have flowers with multiple colours. in this case I used red so this meens you need 1 light red, 1 medium red and one dark red. In this case I''ve started with the lightest colour as shown in the picture above. PLEASE NOTICE! Don't hold your pencil to low .. You should hold it in your hand around the middle of the pencil.. Because if you hold it to low, the pressure will be to mutch and you wil colour to dark, so you can't ad any more layers of colour


Nu gebruik je de middel rode potlood en vult het blaadje in zoals te zien op de foto.
Gebruik hierna je doezelaar en blending solution(dus een beetje blending solution aan je doezelaar )
Vermeng met je doeselaar de lichte en de medium rood..Ga altijd van de lichtste kleur naar de medium kleur enz

Now you can use your medium red to fill in the pettal.
Use your paper stump and blending solution to blend both colours. always go from light to med etc.

Herhaal beide kleuren maar houdt je potloden nu lager vast zodat je meer kleur opbrengt

Repeat both colours and hold your pencils a bit lower so you add more colour.


Gebruik nu het donker rode potlood om diepte en schaduw aan te brengen. In dit geval heb ik het hart van de bloem donker gemaakt. Gebruik hierna weer je doezelaar en blending solution om de 3 kleuren mooi in elkaar over te laten lopen

Now use your dark red pencil to add dept and shading. in this case I added the darkest colour to the hart of the flower..you can also add the dark tone were petals  are toutching eatch other.
Use your paper stump and blending solution again to blend all 3 colours

Kleur dezelfde bloemen allemaal op deze manier

Repeat this on all the flowers that are the same

dit zijn alle rode bloemen ingekleurd

These are all coloured red flowers

Doe nu hetzelfde met de andere bloemen met andere kleuren. Dit zijn de 3 kleuren die ik heb gebruikt voor de zonnebloemen.

Repeat this  with the other flowers using the same technic. These are the 3 colours I've used for the sunflowers


Dit is de stempel met alle zonnenbloemen ingekleurd. Het hart van de bloemen is ingekleurd met 2 kleuren bruin.

This is the stamp with the finished sunflowers. The cores of the flowers are coloured in with 2 shades of brown


Dit is een andere techniek die ik ook wilde laten zien. Ik heb hiervoor een donker oranje potlood gebruikt.
Kleur in het hart van de bloem in met oranje, houd je potlood in het midden vast zodat de eerste laag niet te dik is.
Gebruik je doezelaar en blending solution en begin nu in het hart van de bloem en verdeel de kleur zo naar de bijna buitenkant van de blaadjes. En herhaal dit bovenste nog 1 keer. Nu heb je een bloem die van binnen naar buiten van oranje naar wit toe loopt.

This is a diffrent method that I wanted to show you. I used one pencil, a dark orange one. I started colouring in the hart of the flower. Just a thin layer so hold your pencil in the middle. Use your paper stump and blending solution from the inside of the flower till you get almost to the outside. Repeat this one more time. This time hold your pencil a bit lower.
Now you have a flower that's orange in the inside and white on the outside


Kies 3 verschillende tinten groene potloden, weer 1 lichte, 1 medium en 1 donker groene
Ik heb met de donkerste tint de takjes ingekleurd

Choose 3 pencils in 3 diffrent shades of green so 1 light, 1 medium and 1 dark green.
I coloured the branches with the darkest green

Begin bij de blaadjes weer met de lichtste kleur en gebruik dezelfde techniek als bij de bloemen

Start with the leaves with the lightest colour and use the same method  as on  the flowers


Nog 1 keer de techniek met 1 potlood.

One more time the one pencil  method


Gebruik voor de vaas 3 verschillende tinten blauw, begin in dit geval met de donkerste kleur aan de buitenkant van de vaas.Gebruik dan het medium blauwe potlood en dan het licht blauwe potlood. Gebruik in het midden van de vaas geen kleur. Gebruik weer je doezelaar en blending solution om de kleuren mooi te laten overlopen.
Herhaal dit nog 1 keer en houdt nu je potlood lager vast. Als je dit hebt gedaan ga je met je doezelaar van het lichte blauwe vak naar het midden van de vaas zodat hier heel licht blauw in wordt vermengd.

Use for the vase 3 shades of blue pencils and start with the darkest colour then the medium blue and then the light blue..Leave the middle of the vase white. Use a paper stump and blending solution to blend the 3 shades together from light to dark. Repeat this one more time. And when your finished use your stump to blend the light blue and white


Gebruik 3 tinten grijs om de witte gedeeltes shaduw te geven en gebruik dezelfde techniek als bij het blauw.

Use 3 shades of grey to give the white parts of the vase some shading and use the same method as with the blue

Ik heb met een medium en donker grijze kleur nog schaduw aangebracht om de bloemen en vaas en hiermee ook shaduw gekrieerd op de tafel( medium grijs en licht bruin. Gebruik hiervoor ook weer je doezelaar en je blending solution om het mooi over te laten lopen.

I used a medium and dark grey pencil to add shading arround the vase and flowers and on the table(medium grey and a light brown)Use your paper stump and blending solution  to blend the white with the grey shading

En dit is het kaartje dat ik met deze ingekleurde stempel heb gemaakt.

This is the card I made with the finished stamp.

Creatieve groetjes,
Veer

Happy Crafting!
Veronique